Friday, April 19, 2013

The Onesie Project: March & April


I continue on with my monthly onesie project for Miss GiGi. If this is the first you've seen, check out my other two posts--the October-December and February's.

I can’t believe how quickly my baby girl is growing. Here she is eight months old already! I think this will be the last month I can get her to lay on her back for any period of time so I hope our backyard is green enough for outside May pictures.


I also tried a new idea of writing a paragraph about her development on the picture itself. Love it! Wish I would have thought of that seven months ago!

March was an obvious idea with a clover for St. Patrick's Day. For April I thought I would do a cute umbrella for an "April showers bring May flowers" theme. Ironically the very day I made this onesie we had a record-setting late winter storm and my backyard looked like this:


what?! mother nature, you have some explaining to do.

Here’s a picture tutorial on my March and April onesies:


and a cute orange heart button finishes it off!


April:
i was inspired by a shirt curly girl got from Old Navy with a three-layer umbrella

to stick to my commitment of using materials i already have, i used this hand-me-down top that has just never worked out size & season-wise for either girly

this time i used wonder-under to stabalize my top two layers


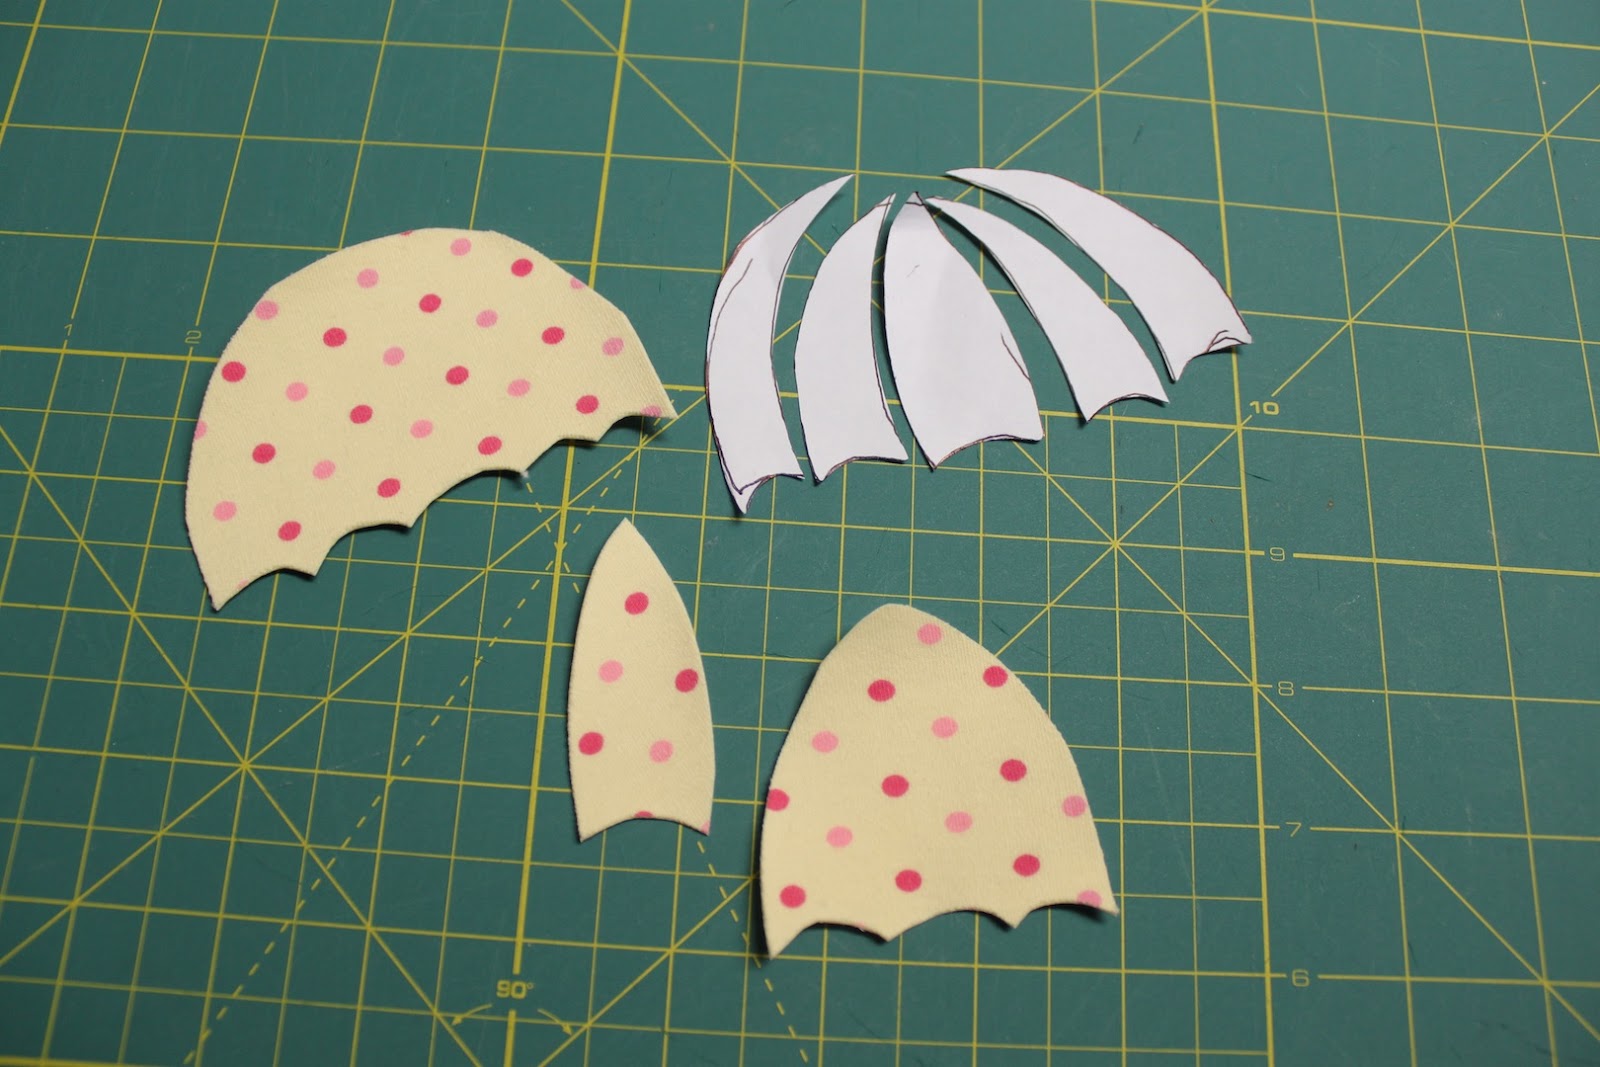
the bottom layer was ironed on and top-stitched onto the onesie

layer two i top-stitched where the top layer would fall so the stitches would be hidden

...and one final layer stitched right down the center

the umbrella handle (made out of the onesie's trim) stitched on


Wednesday, April 17, 2013

DIY Coffee Collar


One of my wonderful students just finished taking her board exam for her athletic training degree so I wanted to treat her to something special. She has brought coffee to me and other folks in the office just to be thoughtful so I thought a nice little congrats gift would be a coffee collar! (...or sleeve or jacket or holder or whatever you want to call them. I just like the alliteration of coffee collar.)

Ooh, these are so cute and trendy! If you are even a beginning sewer this is an easy project to crack out in about 20 minutes. I am amazed folks pay $15-$20 for these things and they require little time and only a couple scraps of fabric. (But hey, Etsy gals, go get ‘em! Perhaps I’ll join you soon.)

Here’s how:

click for easy to print instructions without all the pictures

What you’ll need:
  • 2 scraps of fabric at least 4”x12”. At least one of them should be something thick and insulating. (I used duck cloth and polar fleece for this guy.)
  • a 2.5” piece of thin elastic (I used 1/8”) or a hair band
  • matching thread
  • a coordinating button


Step 1: Cut your pieces

Trace out my pattern or take yourself out for a coffee and trace out the coffee collar you get at your local coffeeshop. If you do this method, be sure to add an extra ¼ to ½ inch around the outside to allow for your seams. (I used ½ inch just because it was easier to trace.) Cut one of your outside fabric and one of your inside.

Cut a 2 ½ inch piece of thin elastic OR if you have some extra hair bands, you can cut one in half and use it instead.

my coffee collar 

 tracing it out

 i used a quilting ruler to trace a 1/2" border around my first tracing

the final pieces all cut out


Step 2: Arrange your pieces and sew!

Stack your fabrics right sides together. Tuck your piece of elastic in the middle of one of the short sides. The loop of the elastic should face into the fabric and the raw edges should line up with the raw edges of your fabric. Pin the elastic in place. With a ¼ inch seam allowance, sew around the outside edge. Leave a two-inch gap to turn your project right sides out. If needed, take a minute to trim up any edges that aren't even to each other.

 tucking in the piece of elastic 

all sewn around the border with a 2" gap

trim it up if your pieces shift in sewing


Step 3: Turn your project right sides out and iron flat

Your elastic loop should be sticking out of one side. Use the end of a pen to push out the edges of your fabric, particularly in the corners. Be sure to neatly press the edges of your gap so that they’re folded in and will be sewn under with your finishing edge.


 my gap. see how neatly if folded it in?


Step 4: Sew your finishing edge

Sew a border around the edge of your fabric about ¼ to ½ inch in to give it a finished look and secure the edges. Check where your gap was to make sure that both raw edges are sewn under. If not, give it one more quick seam between your finishing edge and the outside. It shouldn’t be too noticeable.

all pressed and ready to be sewn!


Step 5: Attach your button

Wrap your coffee collar around a standard mug or your coffee cup from earlier if you still have it. Stretch your elastic a bit and mark where your button should be. Stitch your button in place.


That’s it!


Timeclock: This little guy only took me 23 minutes!

Tuesday, April 16, 2013

Upcycled T-shirt Bib


So my favorite bibs for the girlies are these over-the-head t-shirt bibs that I picked up at Alco (have you ever heard of this store? No? Then you’re not from a small town in North Dakota) when I forgot to pack a bib on a visit to the in-laws. I occasionally see this style in stores but not often enough to build up a collection.

When I kept seeing “upcycled” t-shirt projects on pinterest, I thought I should really try to make my own t-shirt bib using a thrift store t-shirt. Check! …and they turned out so cute!

Upcycled T-Shirt Bib
click for instructions without all the pictures

What you’ll need:
  • 1 old t-shirt
  • ¼ yard of terry cloth (or if you prefer just use more of your t-shirt for the back. if you’ve read some of my other blog posts, you’ll know that I have a love affair with terry cloth)
  • matching thread
  • a sewing machine, pins, and a tape measure

Here’s how:

Step 1: Cut out your pieces

Click here for my pattern

Find a funky t-shirt at a thrift store… or really just pull an old t-shirt out of your closet if you want to be simple about it. Trace out the pattern and cut your pieces. (1 of the t-shirt, 1 of your terry cloth or other backing fabric) I traced my pattern on tissue paper so that I could line up how I wanted the image to appear on the bib.


my pattern ran into the collar so I cut out a separate shoulder piece i'll connect later

  i added a little extra on the bottom to fit my graphic

Step 2: Sew your pieces together

Match up your front and back right sides together. Sew the outer edge of your bib with a ¼ inch seam allowance. Trim your seams to neaten them up. Turn your bib right sides out. Press with an iron.

You might notice that I have an extra seam attaching the top part of the bib to the bottom with the image. When you cut out your picture from the t-shirt you’ll likely find that you run into the t-shirt’s collar so I just cut my pattern at the shoulder and added the extra seam.


my shoulder piece attached and seams pressed open

outer borders sewn together

trimming the edges

Step 3: Create your collar

Use a tape measure to measure the size of your neck opening. If you’re using my pattern, it should be about 15 inches. Cut a piece of your remaining t-shirt the length of your neck plus ½ inch (to allow for a seam). Cut the piece two times the width you want plus ½ inch for the seam. I kept it simple and just made it 2 ½ inches. 15.5" x 2.5" if you're using my pattern.

Fold your piece in half lengthwise and sew the edge together to create a circle. Iron your seam open and fold in half widthwise and iron again. Optional, sew a zig-zag or regular stitched seam along to the bottom to create a neater edge for your final seam.


Step 4: Attach the collar to the bib

Pin the raw edges of your collar to the raw edge of your neck opening. CAREFULLY sew your collar to the neck opening. Take your time and check the seam as you go to make sure you’re sewing through all of the layers. If you struggle with this, make sure you sew the bottom edge of your collar as above and/or the sew the two layers of your neck opening together before you do this seam. It will keep the layers together and make this step a little easier. Zig-zag or serge the edge to clean it up. 


Step 5: Sew your finishing edge

Sew a final finishing edge around the outside square of your bib to keep all of the layers neatly together. Use a zig-zag or decorative stitch if you’re feeling fancy.


look at how thrilled she is!

That’s it!